How to Clean A Chainsaw | The Complete Guide
The chainsaw, which is versatile equipment used by homeowners, serves many purposes, such as trimming and splitting wood, etc. However, to ensure its durability and safety, regular cleaning and maintenance are paramount. This complete guide is your go-to resource for basic instructions on How to clean a chainsaw and maintain step-by-step procedures for keeping your chainsaw in good working order. It is really important to remember that a chainsaw is not just a tool; it’s your reliable cutting companion. Therefore, you should keep your favorite cutting partner in good shape.
Necessary Tools You Will Need
Before you start, you should gather the following tools to how to clean a chainsaw:
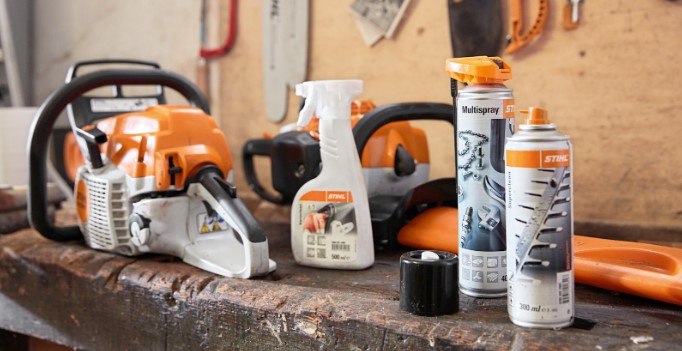
- Clean paintbrush
- Soft cloth
- Filing gauge
- STIHL Super Clean resin solvent or Multi Spray
How to Clean a Chainsaw:
Step 1: Before You Start
Before you embark on any maintenance or cleaning tasks for your chainsaw, it is crucial to take safety precautions. Begin by ensuring that the chainsaw is powered off completely. This means turning off the ignition switch or flipping the power switch to the “off” position. Equally important is disconnecting the spark plug.
In addition to ensuring the chainsaw is powered off, and the spark plug is disconnected, it’s essential to consider the temperature of the chainsaw if it has been in use recently. Chainsaws can become quite hot during operation, and working with a hot machine can pose a risk of burns or other injuries. To mitigate this risk, allow the chainsaw to cool down for a sufficient amount of time before proceeding with any cleaning or maintenance tasks. This simple step helps ensure your safety and the effectiveness of the cleaning process.
Step 2: Remove Stubborn Dirt
In this crucial step, we will focus on removing stubborn dirt, sawdust, and debris from the exterior of your chainsaw. To get started, you’ll need a clean paintbrush and a soft cloth.
Begin by gently brushing away loose dirt and sawdust from various parts of the chainsaw. Pay close attention to the nooks and crannies, as well as any hard-to-reach areas where debris may have accumulated. Using a paintbrush allows you to dislodge and remove particles effectively without causing any damage to the chainsaw’s surface.
Once you’ve removed the loose dirt and sawdust, use a soft cloth to wipe down the chainsaw’s exterior. This will help ensure that any remaining dirt and residue are completely removed. Be thorough in your cleaning process, as even small amounts of debris can impact the chainsaw’s performance. Pay particular attention to vents and cooling fins, as these areas tend to collect dirt and sawdust, which can affect the chainsaw’s ability to stay cool during operation. By following these steps, you’ll have a cleaner chainsaw that’s better prepared for the next task at hand.
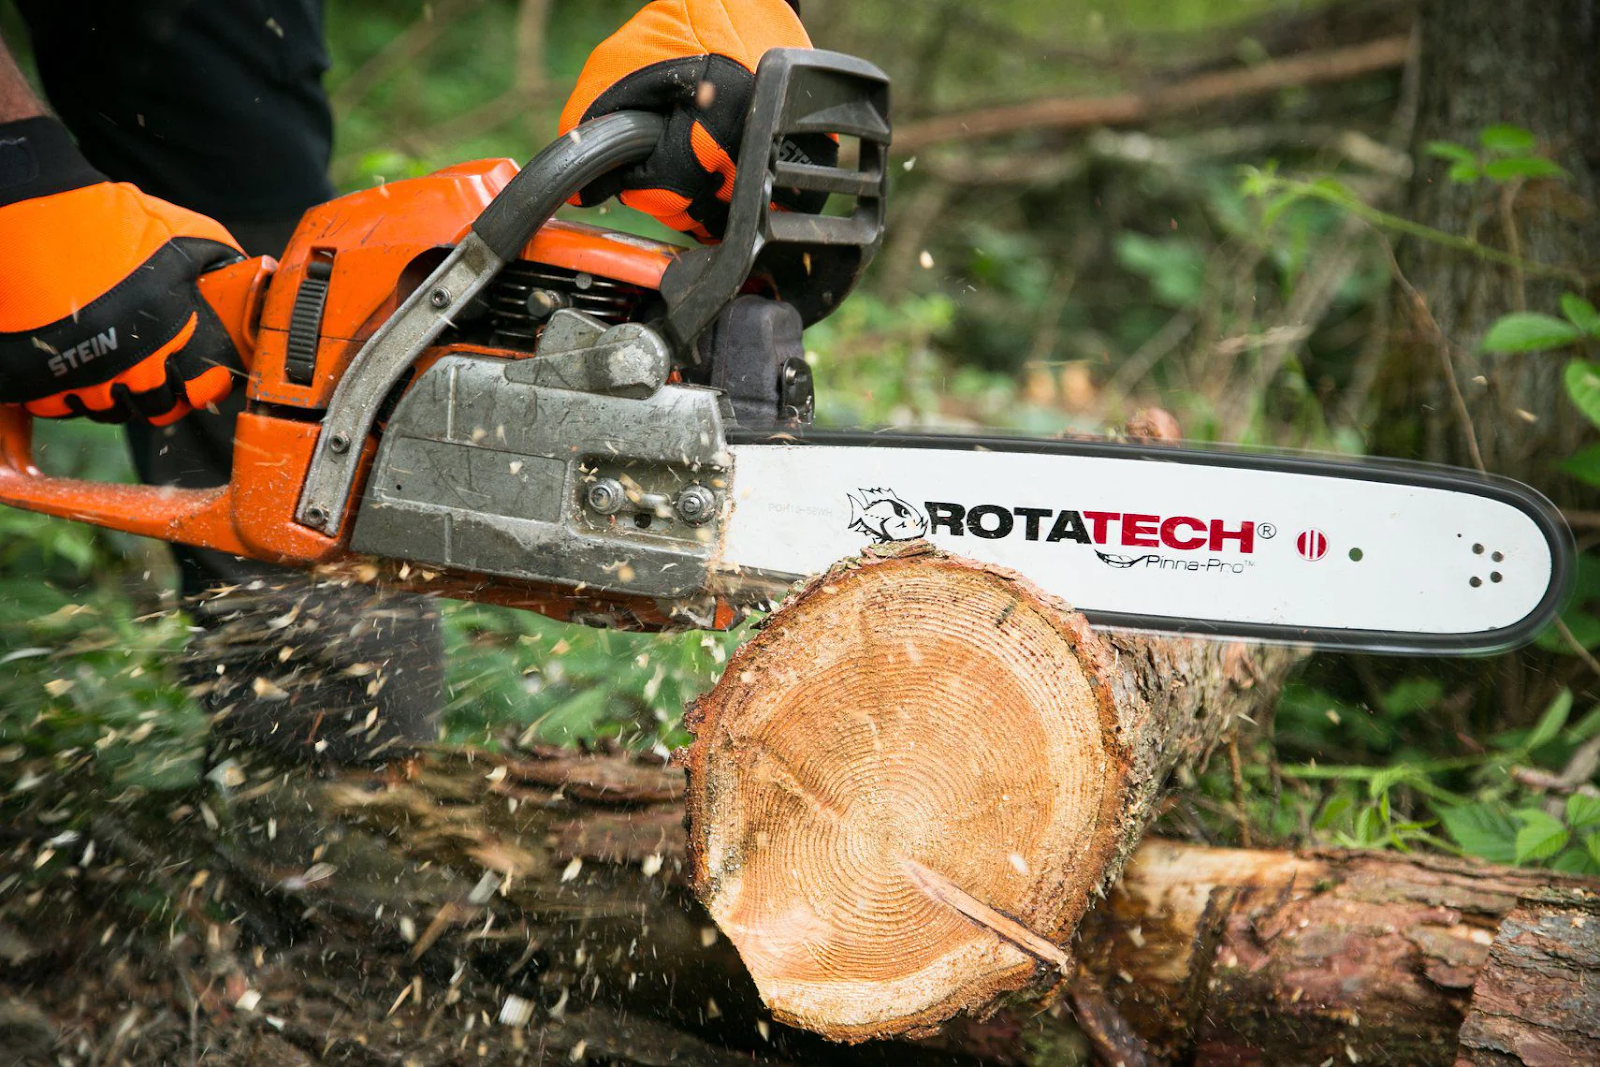
Step 3: Clean The Chain and Guide Bar
You can start by disassembling the chain and guide bar from the chainsaw. Typically, this involves loosening the tension on the chain using the chain tensioning screw and then removing the guide bar and chain from the saw’s body. Make sure the chainsaw is safely powered off before you do this.

Once the chain and guide bar are removed, take a clean cloth or brush and meticulously clean both components. Pay close attention to the chain’s teeth and the guide bar’s groove, as these areas can accumulate dirt and sawdust that may impede cutting performance. Removing all debris is essential for smooth and efficient cutting.
If you find that the chain is particularly dirty or gummed up with sap or resin, it may require more than just brushing. In such cases, consider soaking the chain in a solvent designed for chainsaws, such as STIHL Super Clean resin solvent. After soaking, scrub the chain with a brush to dislodge any stubborn residue. You should make sure the chain is thoroughly dried prior to reassembling it.
Step 4: Clean and Resharpen The Cutting Set
Before proceeding with cleaning and sharpening, carefully inspect the chain’s teeth for any signs of damage or dullness. Look for chipped or broken teeth, as well as excessive wear. If you notice any of these issues, it’s essential to address them promptly for safe and efficient cutting.
To maintain the chain’s sharpness, you use a filing gauge or a dedicated chainsaw file. It’s crucial to follow the manufacturer’s recommendations for the correct filing angle and technique. Typically, this involves filing each tooth at the same angle while applying even pressure. Regular sharpening ensures that your chainsaw cuts cleanly and requires less effort from you.

If you find that the chain is excessively worn, damaged beyond repair, or has too many damaged teeth, it’s time to replace it. A worn-out or damaged chain can compromise both safety and cutting efficiency. Ensure you purchase the correct replacement chain that matches your chainsaw’s specifications for type and size.
Step 5: Clean the Case
Begin by using a clean cloth to wipe down the entire exterior of the chainsaw. This step helps remove any remaining dirt, sawdust, or residue that may have accumulated during use or previous cleaning steps. It also keeps your chainsaw looking well-maintained.
If you encounter stubborn stains, sticky residues, or particularly tough dirt, you may need to use a solvent. Select a solvent that is safe for use on your chainsaw’s casing and follow the manufacturer’s recommendations for application. Apply the solvent to the affected areas sparingly and utilize a fresh cloth to delicately scrub away the dirt or residue. Ensure you wipe off any excess solvent after cleaning to prevent it from coming into contact with the chainsaw’s internal components.
Cleaning the exterior case of your chainsaw not only improves its appearance but also helps prevent contamination of internal parts. A clean chainsaw is easier to handle and maintain, and it reflects your commitment to safety and longevity in your equipment.
Step 6: Fill Up The Oil Tank
You use the specific bar and chain oil recommended by the manufacturer of your chainsaw. This type of oil is specially designed to withstand the high-speed rotation of the chain, reducing friction and heat generation while providing adequate lubrication. Avoid using regular motor oil or other lubricants, as they may not offer the same level of protection.
Filling up the oil tank with the right bar and chain oil is a straightforward yet critical step in chainsaw maintenance. It directly impacts the chain’s lifespan and the overall performance of the chainsaw. Regularly checking and topping up the oil will keep your chainsaw running smoothly and help extend its operational life.
Step 7: Clean the Oil Passage
You start by carefully inspecting the oil passages in your chainsaw. Look for any signs of clogs, blockages, or debris that might impede the flow of oil to the chain and guide bar. Clogs can occur due to sawdust buildup, hardened oil residue, or other foreign materials that find their way into the oiling system.
If you identify any clogs or blockages, use a fine wire or a specialized tool designed for this purpose to clear them. Be gentle but thorough when clearing obstructions, ensuring you don’t damage the delicate components of the oiling system. Pay particular attention to small openings or channels that may be prone to clogs.
Cleaning the oil passages should be part of your regular chainsaw maintenance routine. By keeping the oiling system free from obstructions, you’ll ensure consistent and adequate lubrication, which is essential for the longevity and performance of your chainsaw.
How often should you clean a chainsaw?
The frequency at which you should clean your chainsaw largely depends on how often and intensely you use it. Here are some guidelines to help you determine the appropriate cleaning schedule:
For regular use (frequent operation): If you use your chainsaw regularly for tasks such as tree felling, wood cutting, or forestry work, it’s recommended to clean the chainsaw after every 5 hours of operation. Regular use exposes the chainsaw to more sawdust, debris, and potential wear and tear, making frequent cleaning essential to maintain its performance and longevity.

For occasional use (infrequent operation): If you use your chainsaw less frequently, such as for occasional yard work or seasonal tasks, it’s advisable to clean the chainsaw before and after each use. Occasional use allows less time for dirt and sawdust to accumulate, but it’s still important to ensure the chainsaw is clean and in good working condition before you start a job. Additionally, if you notice reduced cutting performance or any signs of difficulty during operation, consider cleaning the chainsaw immediately to address the issue.
Summary
The article offers you 7 basic but essential steps to clean a chainsaw. Alongside that, we provide you with some advice to assist you during the chainsaw cleaning process. Furthermore, we also offer suggestions on how frequently you should clean a chainsaw. If you find this article helpful, please bookmark it for reference when you clean your chainsaw. And you don’t forget to handle and clean your chainsaw with great care.
Related Articles