How to Clean Pruning Shears – Keeping Your Tools in Top Shape
Pruning shears, those trusty companions of the dedicated gardener, bear witness to the transformation of landscapes and the nurturing of botanical beauty. Yet, amidst their ceaseless efforts, the rigors of outdoor work can leave them corrode or tarnish in the air. Cleaning pruning shears is indeed a vital practice for any gardener looking to maintain the efficiency and longevity of their tools. As we delve into the cleaning pruning shears, we embark on a journey that not only rejuvenates these essential tools but also reflects the care and dedication we invest in our gardening endeavors.
In this guide, we unravel a step-by-step process of how to clean pruning shears – keeping your tools in top shape. From disassembling with care to revitalizing the pivot area, every meticulous action speaks to a narrative of preservation, echoing our commitment to keeping our tools in pristine condition. Join Bebest as we uncover the secrets to maintaining the excellence of our pruning shears, enabling us to sculpt our green havens.
Why Is It Important To Clean Pruning Shears?
Maintaining the cleanliness of your pruning shears through regular attention is of utmost importance. The accumulation of plant debris, dirt, and sap on the blades can significantly compromise their functionality. When left unchecked, this buildup can cause the blades to become sticky and lose their sharpness, resulting in cuts that are neither precise nor efficient. Consequently, the very purpose of using pruning shears to ensure neat and accurate cuts can be undermined by neglecting their cleanliness.
However, the consequences of using dirty pruning shears extend beyond mere inefficiency. In the world of gardening, where plants interact closely with one another, the risk of disease transmission is a significant concern. Unclean pruning shears can unwittingly act as vectors, transferring pathogens from an infected plant to a healthy one through the simple act of trimming or pruning. This potential for disease spread emphasizes the critical need for a proactive cleaning routine.
By diligently adhering to a regular cleaning regimen, you can not only preserve the effectiveness of your pruning shears but also contribute to the overall health and well-being of your garden. Preventing the buildup of debris, dirt, and sap not only maintains the integrity of the shears but also reduces the likelihood of unintentional disease transfer. This small yet impactful practice can play a substantial role in safeguarding the vitality of your plants and ensuring their flourishing growth.

How to Clean Pruning Shears
Pruning shears, those indispensable tools for gardeners, hold the power to transform unruly foliage into beautifully manicured landscapes. However, as they tirelessly snip and trim, these trusty companions inevitably accumulate dirt and rust, diminishing their effectiveness over time. Regular cleaning is necessary to keep your pruning shears functioning at their best. Here’s a step-by-step guide to help you maintain your pruning shears and prolong their lifespan:
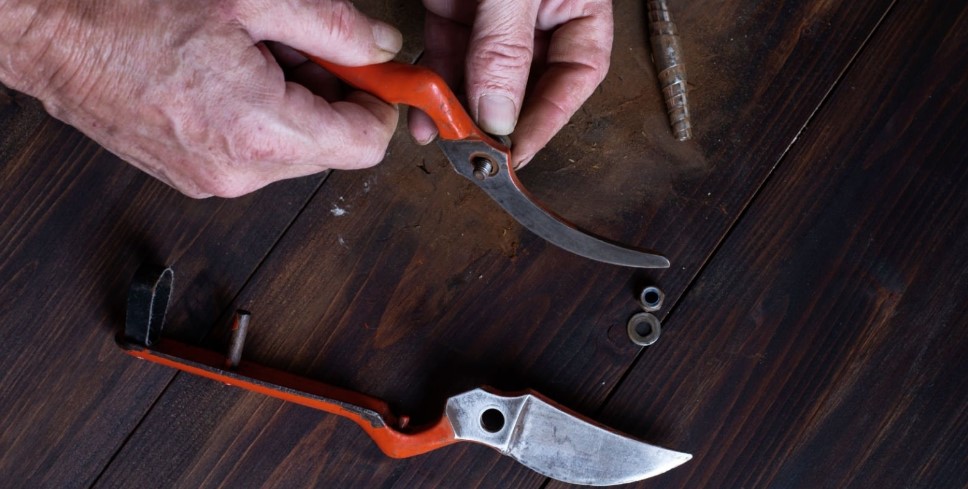
Step 1: Dismantle with Care
Initiating the process of restoring your pruning shears to their optimal state begins with meticulous disassembly. Within the design of many models, a crucial screw or nut binds the two blades together. Employing a screwdriver or wrench with gentle precision loosens this fastening mechanism, allowing the blades to gracefully part ways.
While engaging in this task, exercise vigilant mindfulness toward the possibility of small components detaching during the process. These intricacies, though minute, contribute to the seamless functioning of your shears and should be handled with care. The act of dismantling forms the foundation for the subsequent steps, setting the stage for a comprehensive cleaning journey that will ultimately breathe new life into your essential garden tools.
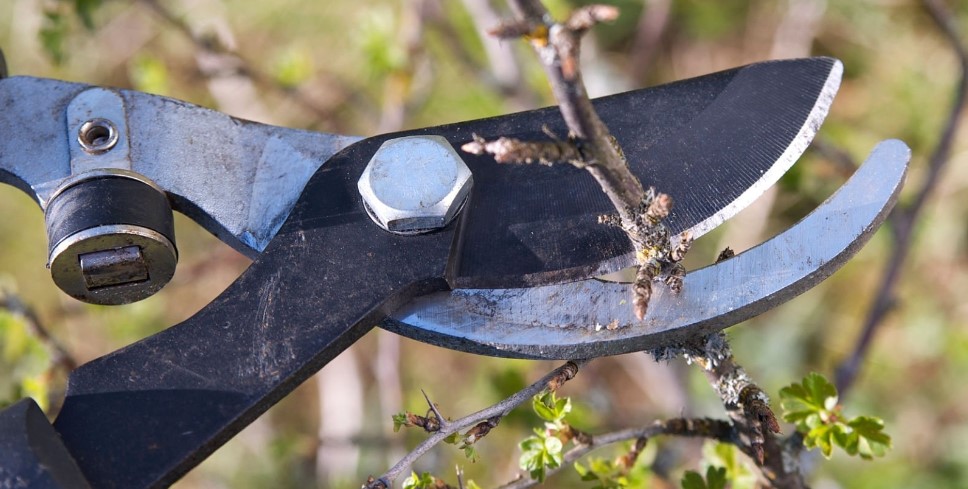
Step 2: Deftly Cleanse the Blades
With the blades now exposed and the foundation set, it’s time to embark on the cleansing phase—a transformation that unveils the hidden gleam of your pruning shears. Armed with a damp cloth or sponge, engage in a methodical wiping away of any lingering dirt, sticky sap, or stubborn debris that has accumulated over time. This step-by-step approach ensures that every nook and cranny is tended to, leaving no residue behind.
For particularly obstinate stains, a mild soap or gentle detergent solution proves to be a worthy ally. Employing this solution with care, you meticulously dissolve and lift away the persistent remnants that may have clung to the blades. Following this thorough cleansing, a rejuvenating rinse under the embrace of clean water paves the way for the final touch—careful drying with a towel. In these deliberate actions lies the secret to uncovering the shears’ original brilliance and preparing them for the next stages of restoration.
Step 3: Tackle Rust if Needed
Should the passage of time have left its mark in the form of rust or corrosion on your pruning shears, there’s no need for despair. Enter the realm of rust-tackling, armed with the finesse of fine-grit sandpaper. With a delicate touch, engage in the art of abrasion, gently coaxing away the rust that has encroached upon the blades. This methodical process not only removes the unwanted rust but also polishes the affected areas, restoring a smooth and pristine surface.
In cases where the rust proves more resistant, a duo of steel wool or a wire brush steps onto the stage, ready to conquer even the most tenacious corrosion. Proceeding with mindfulness, you wield these tools with precision, eradicating rust without compromising the integrity of the blades. As the rust yields to your patient efforts, what remains is a canvas of renewed potential, a testament to the power of restoration.
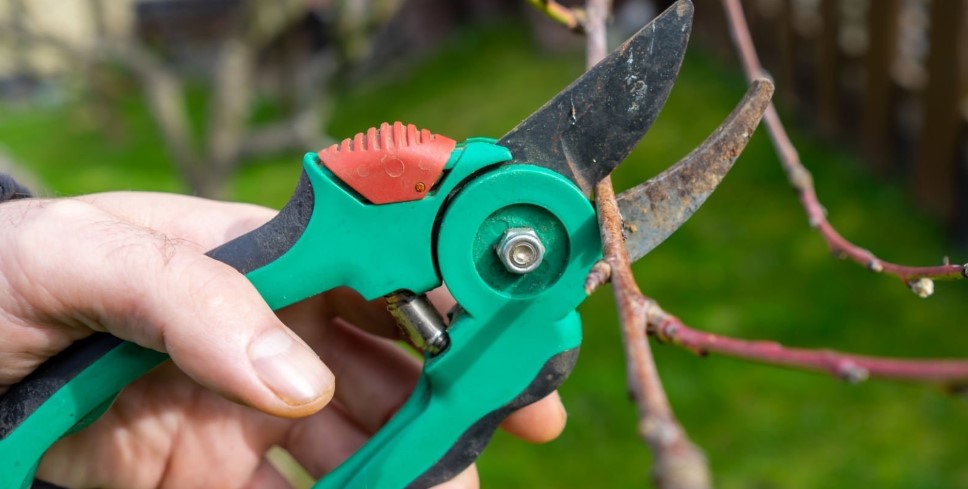
Step 4: Revitalize the Pivot Area
Within the anatomy of your pruning shears, the pivot area stands as a vital junction where the blades intersect and operate in harmony. However, this critical juncture is susceptible to the accumulation of dirt and grease that can impede functionality. It is here that the meticulousness of a cotton swab or a toothpick shines. With meticulous patience, you navigate this intricate space, ensuring that no trace of debris remains lodged. But beyond cleansing, this is a juncture where you sow the seeds of prevention against future rust and friction.
A judicious application of lubricant, be it oil or the trusty WD-40, transforms this area into a realm of smooth operation. As the lubricant’s embrace takes hold, the pivot area stands fortified against the threats of rust, ensuring that your shears continue to function effortlessly with each opening and closing motion. It’s in this meticulous attention to detail that the pivot area transcends from a mere functional element to a cornerstone of operational excellence.
Step 5: Reunite and Reinvigorate
With the blades now in their individual states of renewed splendor and the pivot area fortified for optimal performance, the time has come for a harmonious reunion. As you align the blades with surgical precision, the process of reassembly commences. The screw or nut, a vital component that binds the blades together, finds its designated place once again. Employing a screwdriver or wrench, you embark on securing this fastening mechanism, ensuring a snug yet not overly tight union.
Striking this balance is pivotal, as it guarantees both the integrity of the connection and the shears’ ease of operation. Through your diligent efforts, the blades regain their seamless interaction, opening and closing with the fluidity of a well-choreographed dance. In this culmination of the reassembly process, you breathe new life into your pruning shears, infusing them with the vigor to tackle gardening tasks with renewed enthusiasm.
In embracing these meticulous steps of care and restoration, you’ve not only revived your pruning shears but also showcased your commitment to their optimal function and longevity. Each layer of attention you’ve meticulously applied, from disassembly to reassembly, has woven a narrative of revitalization. Armed with your freshly rejuvenated tool, you stand ready to cultivate your green sanctuary with precision, passion, and the satisfaction that comes from honoring the tools that help you bring your garden to life.
How Often to Clean Gardening Tools
If you love gardening, you know how important it is to keep your tools clean and well-maintained. Not only will this extend their lifespan and save you money, but it will also prevent the spread of diseases and pests among your plants. But how often should you clean your gardening tools? Here are some tips to help you out.
- After each use: You should always wipe off any dirt or debris from your tools with a dry cloth or brush after using them. Your tools will stay sharp and ready for the next job thanks to this protection against rust and corrosion. You can also spray some WD-40 or vegetable oil on the metal parts to lubricate them and prevent moisture buildup.
- Once a month: You should give your tools a deeper cleaning once a month or more often if you use them frequently. To do this, you will need a bucket of warm water, some dish soap, a wire brush, a rag, and some steel wool. First, soak your tools in soapy water for about 10 minutes to loosen any dirt or grime. Then, scrub them with a wire brush and steel wool to remove any rust or stains. Rinse them well and dry them thoroughly with the rag. Finally, apply some oil or wax to the metal parts to protect them from rusting.
- Once a year: You should also sharpen your tools once a year, or whenever they become dull or damaged. This will improve their performance and make your gardening work easier and safer. You can use a file, a whetstone, or a sharpening tool to sharpen your blades, following the manufacturer’s instructions. Be careful not to over-sharpen or damage your tools, and always wear gloves and eye protection when doing this.

Tips to Keep Pruning Shears Clean Longer
Pruning shears, the steadfast companions of every gardener, possess the ability to shape landscapes with precision and care. Yet, as they dutifully trim and snip, the inevitable accumulation of dirt and rust can cast a shadow over their once-sharp efficiency. To ensure these essential tools remain steadfast allies throughout your gardening journey, consider the following practices:
Embrace Post-Prune Hygiene
Cultivate the habit of cleaning your pruning shears after each use. This simple act halts the build-up of sap, dirt, and debris that can lead to corrosive damage. With a damp cloth, a gentle soap, or a mild disinfectant, wipe the blades clean. Prioritize thorough drying before tucking them away for storage.
Cherish Blade Sharpness
Regular sharpening of your shears is paramount. Dull blades not only jeopardize your plants’ health but also complicate the pruning process. Equip yourself with a sharpening stone, a file, or a specialized sharpening tool. Adhere closely to the manufacturer’s guidelines, mindful not to over-sharpen or inadvertently harm the blades.

Infuse Lubrication Care
Occasional oiling serves as a gesture of care towards your shears. Lubricating the blades and hinges enhances their maneuverability and fends off rust. A variety of oils—ranging from vegetable to mineral oil—can be employed. The best results are obtained by rubbing a few drops of oil into the blades and hinges before wiping away any excess.
Housing and Habitat Matters
Give due thought to the storage of your shears. Shielding them from moisture, dust, and unwelcome critters is pivotal. Explore options such as protective cases, cloth bags, or hooks to preserve their condition. Opt for a cool, dry, and well-ventilated sanctuary, safeguarding them from the harsh elements of direct sunlight or the outdoor environment.
Safety Considerations When Clean Pruning Shears
Pruning shears stand as invaluable companions in the world of gardening, allowing us to shape our green spaces with precision and finesse. To ensure these tools maintain their longevity and perform at their best, proper care and maintenance are paramount. As you embark on the task of cleaning these essential implements, it’s crucial to place safety at the forefront. Here’s a comprehensive guide that amalgamates both care and safety:
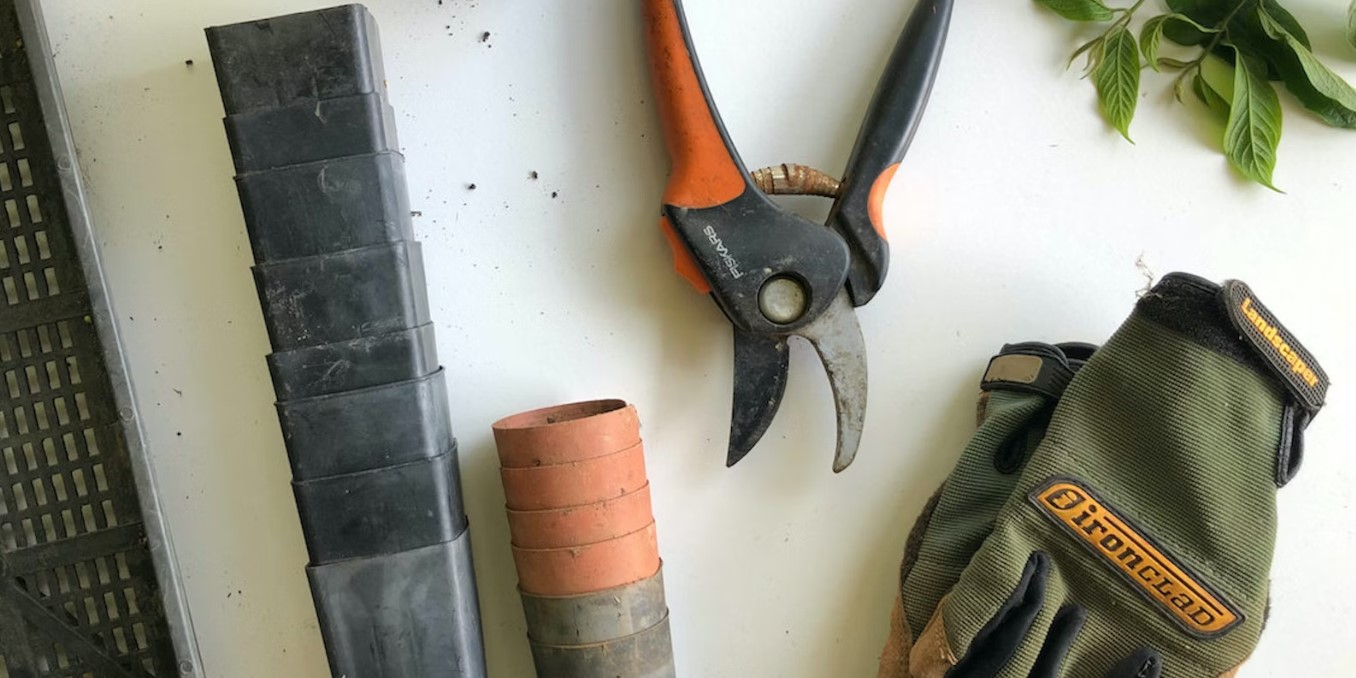
Prioritize Hand and Eye Protection
Begin by outfitting yourself with the appropriate protective gear. Slip on a pair of sturdy gloves to shield your hands from potentially sharp edges and the effects of cleaning agents. Equally important is the donning of eye protection, which safeguards your eyes from any debris that might become airborne during the cleaning process.
Commence with Diligent Debris Removal
Embark on the cleaning journey by meticulously removing accumulated debris from the shears’ blades. Employ a soft rag or a delicate brush to gently dislodge dirt, sap, and plant residue. This first step ensures that your following efforts are not hampered by remaining debris and lays the groundwork for a complete and efficient cleaning process.
Hygiene Through Disinfection
Recognize the vital role of disinfection in maintaining the health of your plants. Utilize disinfectants such as rubbing alcohol, bleach, or hydrogen peroxide to disinfect the blades. Exercise caution when handling these potent agents, adhering to recommended dilution ratios to mitigate the risk of skin irritation or damage to the tool’s surface.
The Grace of Delicate Oiling
Embrace the art of delicate oiling, a step that rejuvenates the shears’ performance. Applying a light lubricant, such as WD-40 or mineral oil, orchestrates a symphony of benefits. Rust prevention, smooth blade movement, and the overall enhancement of the tool’s longevity are the harmonious outcomes of this practice. As you apply the lubricant, exercise prudence to control the quantity and prevent over-application.
Shelter in Optimal Storage
Conclude your diligent cleaning ritual with a thoughtful consideration of storage. Provide a sheltered abode for your shears, shielding them from the potential harms of moisture, dust, and direct sunlight. Whether through hanging, protective cases, or a dedicated tool storage area, ensure your shears find reprieve in a dry, cool environment that preserves their pristine condition.

FAQs
How Can You Get Rid Of Sap From Pruning Shears?
If you’ve been pruning your trees or shrubs, you might have noticed that your shears get sticky with sap. Sap can make your shears dull, rusty, and hard to use. So how can you get rid of sap from pruning shears? Here are some tips:
- Use rubbing alcohol. Rubbing alcohol is a great solvent that can dissolve sap and disinfect your shears. Simply clean your shears with rubbing alcohol and a piece of cloth or paper towel. You can also dip your shears in a container of rubbing alcohol and let them air dry.
- Use vegetable oil. Vegetable oil can also help remove sap from your shears. Just apply some oil to a cloth or paper towel and rub your shears until the sap is gone. You can also soak your shears in a bowl of oil for a few minutes and then wipe them off. Vegetable oil can also prevent rust and lubricate your shears.
- Use soap and water. Soap and water can work well for removing light sap residue from your shears. Simply use warm water and dish soap to clean your shears, brushing with a sponge or brush as necessary. Then rinse them well and dry them thoroughly.
- Use vinegar. Vinegar is another natural solvent that can cut through sap and sanitize your shears. Simply combine vinegar and water in an equal amount in a spray bottle, and thoroughly mist your shears. Then use a cloth or paper towel to wipe them. You can also soak your shears in a bowl of vinegar and water for a few minutes and then rinse them off.
- Use baking soda. A mild abrasive like baking soda might help you get tough sap off of your shears. Simply mix baking soda and water into a paste and use a cloth or paper towel to wipe it onto your shears. Then scrub gently with an old toothbrush or steel wool. Rinse well and dry thoroughly.

How should I store my pruning shears?
You should store your pruning shears in a dry and cool place, away from moisture and humidity. To stop rust and corrosion, you may also rub a tiny layer of oil or lubricant onto the blades and hinges. You should also sharpen your shears regularly to maintain their cutting performance.
How should my pruning shears be cleaned?
If you’re a gardener, you know how important it is to keep your pruning shears clean and sharp. Not only will this make your job easier, but it will also prevent the spread of diseases and pests among your plants. But how should your pruning shears be cleaned? Here are some hints and techniques to assist you.
- First, you need to remove any dirt, sap, or debris from the blades. For this, you can use a wet cloth, a soft brush, or a toothbrush. If the blades are really sticky, you may let them a few minutes to soak in warm water with some dish soap. After that, use a fresh cloth to wipe them dry.
- Next, you need to disinfect the blades to kill any bacteria or fungi that might be lurking on them. You can use a variety of products for this, such as rubbing alcohol, bleach, hydrogen peroxide, or vinegar. Just make sure to dilute them with water according to the instructions on the label. Then, dip a cotton ball or a paper towel in the solution and wipe the blades thoroughly. Let them air dry or wipe them with a dry cloth.
- Finally, you need to sharpen the blades to maintain their cutting edge. You can use a whetstone, a file, or a sharpening tool for this. Simply adhere to the manufacturer’s instructions and take care not to nick yourself. You should sharpen your pruning shears at least once a year or more often if you use them frequently.
Final Thoughts
Pruning shears are a necessary piece of equipment for every gardener, but they may also age and become sticky, rusted, and dull. That’s why it’s important to clean them regularly and properly, to keep them in top shape and extend their lifespan. In this article, we have shown you how to clean pruning shears – keeping your tools in top shape, depending on the level of dirt and damage. We have also given you some tips on how to prevent corrosion, sap buildup, and disease transmission. You can make sure that your pruning shears are consistently used and operate effectively by adhering to these easy procedures.
Related Articles