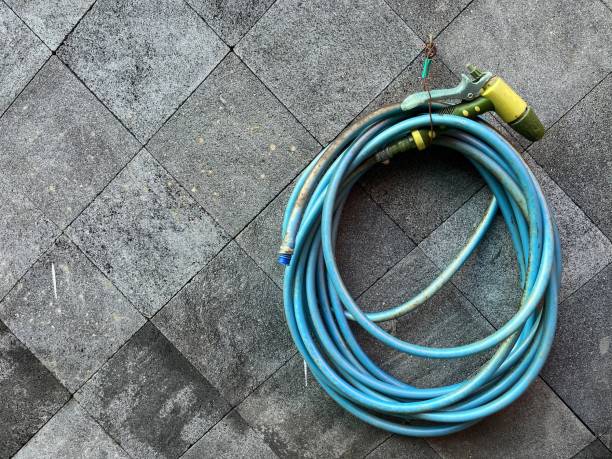
How to Remove Garden Hose Connectors the Right Way
Getting a garden hose untangled from a pressure washer proving can be considered a challenge. It might be frustrating to struggle with connections that refuse to budge. Never fear! If you’re wondering how to remove garden hose connectors, you’ve come to the right place! Here, we’ll show you how to do it safely and efficiently. By using our basic techniques of disconnecting, you can put an end to the hassle and regain control.
What You Need to Remove Stuck Garden Hose
Having the right tools on hand can make all the difference when trying to untangle a garden hose connector that has become stuck. You will need these items to free your garden hose from the trap it is caught in.
- Garden Hose Connector
- Flathead Screwdriver
- A Wrench/ Pliers
- Additional Flathead Screwdriver
Steps for How to Remove Garden Hose Connector
Freeing a garden hose connector from its tight grip requires a systematic approach that combines careful techniques and the right tools. Whether you’re faced with stubborn connectors due to excessive tightness, rust, or general resistance, these detailed steps will walk you through the process of successfully removing the connector without causing damage.
Step 1: Prepare for Removal
To get started, close the valve that is attached to the water supply for the garden hose. Because of this preventative action, any sudden spikes in water pressure that would impede your efforts to remove the object will be avoided. In addition, before you begin the task, put on a pair of work gloves to protect your hands from any potentially sharp edges, debris, or irritants that may be present in the area around the connector. This should be done before you begin the task.
Step 2: Loosen the Connector Tabs
Using pliers or a wrench, gently attempt to loosen the connector tabs. These tabs are the key to unlocking the grip of the connector. Turn them counterclockwise to gradually release the initial hold. When applying force, be mindful not to exert excessive pressure, as this could lead to damage to the tabs or the connector threads. If you encounter stubborn tabs, using a flathead screwdriver for additional leverage can aid in loosening them.
Step 3: Use a Hacksaw (if Needed)
In the event that the connector for the garden hose is irreparably broken, excessively rusted, or corroded to the point where it cannot be loosened, you may discover that you have no choice but to resort to using a hacksaw. This stage calls for accuracy and attention to detail. Cut through the connector with care, ensuring that your attention is only focused on removing the connector itself while maintaining the integrity of the hose. To avoid causing any accidental harm, be sure to take your time with this step.
Step 4: Loosen Rust and Debris
Check to see if there is any rust or debris that has built up on the threads of the connector. Particles can collect over time as a result of prolonged exposure to a variety of factors, which might impede the turning action. Make use of a wire brush to remove these particles in a gentle yet efficient manner. You may make the threads on the connector smoother by removing any rust and debris that may have accumulated there. This will reduce the amount of friction that exists throughout the removal procedure.
Step 5: Apply WD-40 and Repeat Process
For connectors that present rust-related challenges, applying a small amount of WD-40 can work wonders. WD-40 helps penetrate and loosen any remaining rust or grime. Apply the WD-40 to the threads of the connector and give it a few minutes to work its magic. After the brief wait, repeat the loosening process from Step 2. The presence of WD-40 should significantly reduce friction and make turning the connector more manageable.
Step 6: Reassemble and Clean
After successfully removing the garden hose connector, take a moment to thoroughly clean it. Remove any lingering traces of WD-40, rust, or debris. A clean connector not only ensures a smoother reattachment but also minimizes the risk of any complications arising in the future. Inspect the threads for any signs of damage, as this is the opportune time to address any potential issues.
Step 7: Use Hands to Twist
Now that the connector has been cleaned and lubricated, you should make an effort to gently rotate it using your hands. It is anticipated that the combination of the measures that came before will greatly lower resistance. Before performing the twisting motion once more, you should consider reapplying WD-40 to the connector and allowing it more time to penetrate if there is still any resistance being presented by it.
Step 8: Reassemble and Finish
With the connector turning more smoothly, it’s time to reattach it to the pressure washer or other equipment. Be cautious not to overtighten the connector, as this can lead to future complications. Turn on the water supply and carefully inspect the connection for any leaks. If everything appears in order, you’ve successfully completed the removal and reattachment process, ensuring that your garden hose is ready for action.
Each step in this process is designed to address specific challenges, from loosening tabs and tackling rust to applying lubrication and careful reassembly. By following these comprehensive steps, you’ll not only overcome the struggle of removing a connector but also gain the skills and confidence to handle similar tasks in the future.
Tips for Protecting Your Garden Hose After Connection
Taking care of your garden hose doesn’t stop at simply connecting it; it’s essential to follow proper maintenance practices to ensure its longevity and optimal performance. Here are detailed tips to help you protect your garden hose and make the most out of your investment.
Winter Precautions
As the cold weather moves in, it is imperative that you take precautions to protect your garden hose from any potential harm that could result. Remove the hose from the pressure washer and empty it completely of any water that may still be inside it before the temperature drops below freezing. If water is allowed to remain inside the hose, it may freeze and expand, which may result in splits or ruptures. If you want to keep the hose in good condition, you should always keep it stored inside, where it can be kept dry and at a consistent temperature. The hose can be protected from the damaging effects of the environment by either being hung on a wall-mounted hook or being wound up neatly and stored in a shed.
Avoiding Tangles and Kinks
Kinks and tangles can cause significant damage to your garden hose over time. When storing the hose, avoid sharp bends and kinks that can compromise the hose’s structural integrity. Instead, create broad and loose loops when coiling it up for storage. Employing a hose reel or hanger can also help keep the hose organized and free from tangles. When using the hose, ensure it’s laid out straight without any twists or knots that can lead to kinking during water flow.
Keep out of the Sun
Prolonged exposure to direct sunlight can degrade the materials of your garden hose, causing it to become brittle and more susceptible to cracks and leaks. To shield your hose from the sun’s harmful UV rays, store it in a shaded area or use a hose reel with a built-in cover. If a hose reel isn’t an option, consider using a hose cover or simply place the hose in a shaded spot when not in use. By protecting your hose from the sun, you’ll extend its lifespan and maintain its flexibility.
Preventing Damage to Fittings
The functionality of your garden hose is entirely dependent on the fittings and connectors that it comes equipped with. During use, you should avoid pushing or yanking firmly on the hose in order to prevent any damage from occurring. These kinds of actions can put a strain on the fittings, which might result in leaks or even detachment. Be sure to move slowly and carefully whenever you are installing or detaching the hose. This approach will not only safeguard the fittings, but it will also keep the hose itself from being subjected to unnecessary stress.
Regular Inspection
Routine inspections are key to catching minor issues before they escalate into significant problems. Regularly examine the entire length of the hose for any signs of wear, including cracks, abrasions, or bulges. Inspect the fittings for leaks, corrosion, or any visible damage. If you notice any problems, address them promptly. Replacing a worn-out washer or a damaged fitting is far easier and more cost-effective than dealing with a burst hose during a crucial gardening moment.
With proper maintenance, your garden hose will serve you well for many years, allowing you to enjoy years of worry-free gardening and other outdoor activities.
FAQs
How can I safeguard my garden hose from damage after connecting it?
Protecting your garden hose from damage after connecting it involves adopting a few simple yet effective practices. First, ensure that the hose is laid out in a way that minimizes the risk of tripping or crushing. It is important to stay away from stacking anything too heavy on top of the hose, as this can lead to abrasions and weakening of the material. Additionally, be mindful of the hose’s positioning during use to prevent it from rubbing against sharp edges or abrasive surfaces. When you’re finished using the hose, carefully detach it from the equipment, making sure not to yank or tug forcefully on the connector. Finally, store the hose in a coiled manner or on a hose reel to keep it organized and free from tangles, ensuring its longevity and continued performance.

What steps should I take to prepare my garden hose for winter storage after connecting it?
Properly preparing your garden hose for winter storage is crucial to prevent freezing, cracking, and damage. After disconnecting the hose from the equipment, thoroughly drain any remaining water by elevating one end and allowing gravity to assist in the drainage process. When you have finished using the hose, take a towel or a piece of cloth and wipe down the inside to eliminate any excess moisture. Coil the hose loosely to prevent kinks, and store it in a dry and temperature-controlled area, such as a garage or shed. By ensuring that the hose is entirely dry and protected from freezing temperatures, you’ll prevent potential damage and ensure it’s ready for use in the spring.
Are there specific storage techniques to prevent kinks and tangles in my garden hose after it’s connected?
Yes, there are effective storage techniques to prevent kinks and tangles in your garden hose, even after it’s been connected. One approach is to use a hose reel designed to keep the hose neatly organized. A hose reel allows you to coil and uncoil the hose effortlessly, reducing the risk of kinks.
If a hose reel isn’t available, consider using a hose hanger to suspend the hose from the ground. When storing the hose, avoid sharp bends and twists that can lead to kinking. Instead, create wide loops that maintain the hose’s natural shape. Additionally, avoid hanging heavy objects on the hose or placing it under other equipment, as this can cause unnecessary pressure and result in tangles or kinks over time.
What’s the best way to store my garden hose during the summer months?
If you take precautions to shield your garden hose from the sun’s rays over the warm summer months, you may expect it to have a longer lifespan and better overall performance. To prevent the garden hose from becoming damaged by the sun, either put it away in an area that is shaded or purchase a reel that is built from materials that are resistant to ultraviolet light.
In addition, make sure that the hose is not lying on the ground anywhere, as this could result in the hose being damaged by lawnmowers or by people walking on it. If you give your garden hose this kind of attention throughout the summer, it will remain in good condition and be ready for use when October rolls around.
Final Thoughts
The question of how to remove a garden hose connector should not be a source of frustration if you put your mind to it. You will be able to disconnect hose connections like an expert if you read this article and follow the steps properly. Additionally, you will avoid damaging the fittings or the hose itself. Let go of your concerns as you explore the world of garden hoses, with the knowledge that the lifespan of a hose may be substantially extended by proper storage and routine maintenance. In doing so, you will be able to use the hose for a significantly longer period of time!
Related Articles